The purpose of this post is to help beginners (new users to Selenium RC) help setting up Selenium RC with TestNG using Eclipse.
Before setup
I am assuming that you have done the following steps:
Setup the test environment
Please follow the following step by step instructions to setup the test environment:
- Launch Eclipse, you can locate any directory as your default workspace. In this example, my default workspace is :
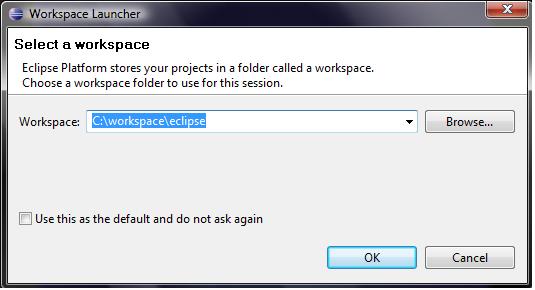
Click OK, Eclipse will be launched.
-
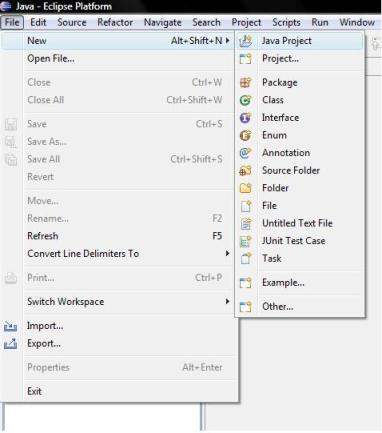
Click File > New
-
Set the project name as Google.

Click Next.
-
On the Source tab leave the default >
Click on Libraries >
Click on Add External Jars >
Add the jar files for TestNG and Selenium RC Java client as shown below:
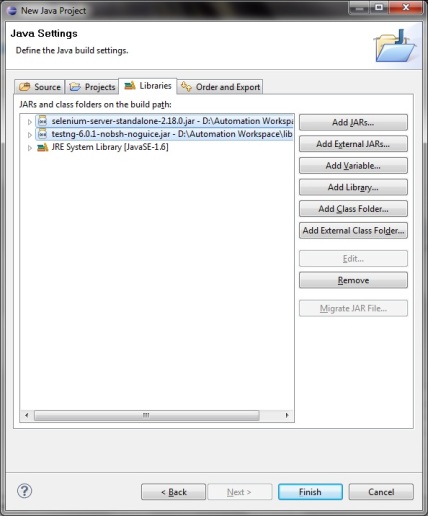
Click Finish, now you will have a Java project created in Eclipse that isĀcorrectly set to use Selenium Client andĀTestNG jar files.
-
NowĀRight Click on the src > New > Class
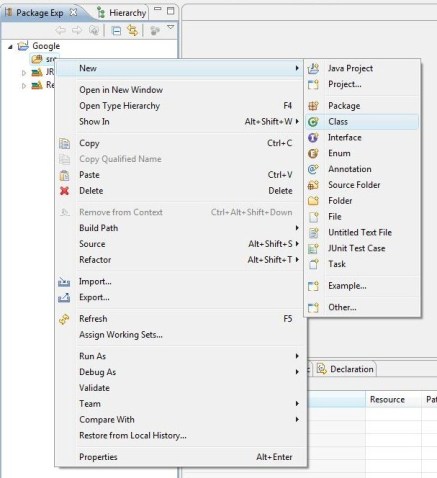
Name the class file as GoogleTest and Click Finish.
-
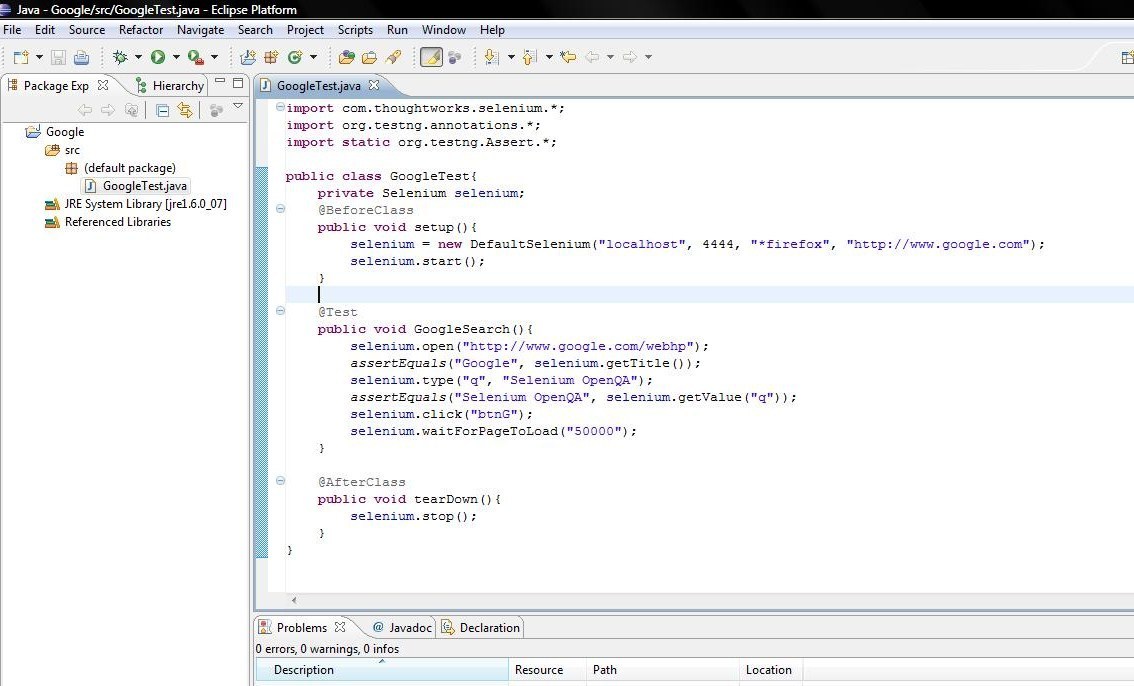
Now create a testng test within GoogleTest class as follows:
-
The next step is to run the Selenium Server as
java -jar selenium-server-x.xx.x.jar (see Running Selenium Server)
-
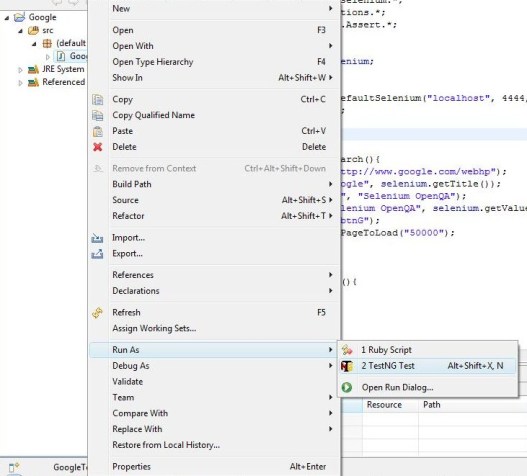
Now Right Click on the test and run this as TestNG test.
-
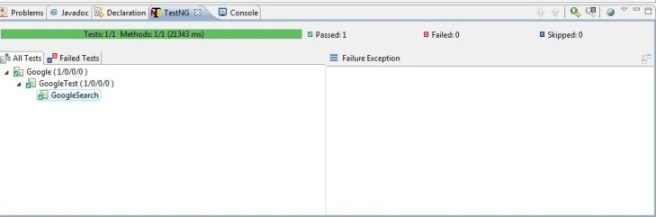
The test will be successful.
For more details please go through my post Getting started with Selenium RC (selenium 1) with TestNG