Make sure you have a Java environment installed. If you don't have java in your machine, install first before proceeding.
For how to install you can refer Installing Java from my article.
The latest stable version of Ant is available from the Ant web page http://ant.apache.org/
The binary edition of Ant is shipped with 3 different compression formats : .zip ,.tar.gz and .tar.bz2
The .zip format is recommended compression format for Windows
Uncompress the downloaded file into a directory.
The binary distribution of Ant consists of the following directory layout :
README, LICENSE, fetch.xml, other text files (contains basic information)
bin (contains launcher scripts)
lib (contains Ant jars plus necessary dependencies)
docs (contains documentation)
etc (contains xsl goodies)
Only the bin and lib directories are required to run Ant. To install Ant, choose a directory and copy the distribution files there. This directory will be known as ANT_HOME.
Follow the following steps to set up ant path in your machine :
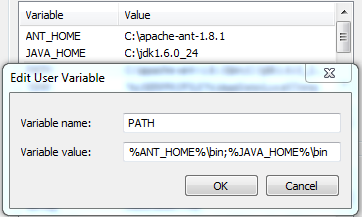
Add the bin directory to your path.
Set the ANT_HOME environment variable to the directory where you installed Ant.
Optionally, set the JAVA_HOME environment variable.
Below is an example snap for clear understanding :
You can check the basic installation with the following :
ant
ant -version For more clear please go through Getting Started with Apache Ant
For more details visit Apache's http://ant.apache.org/ webpage.